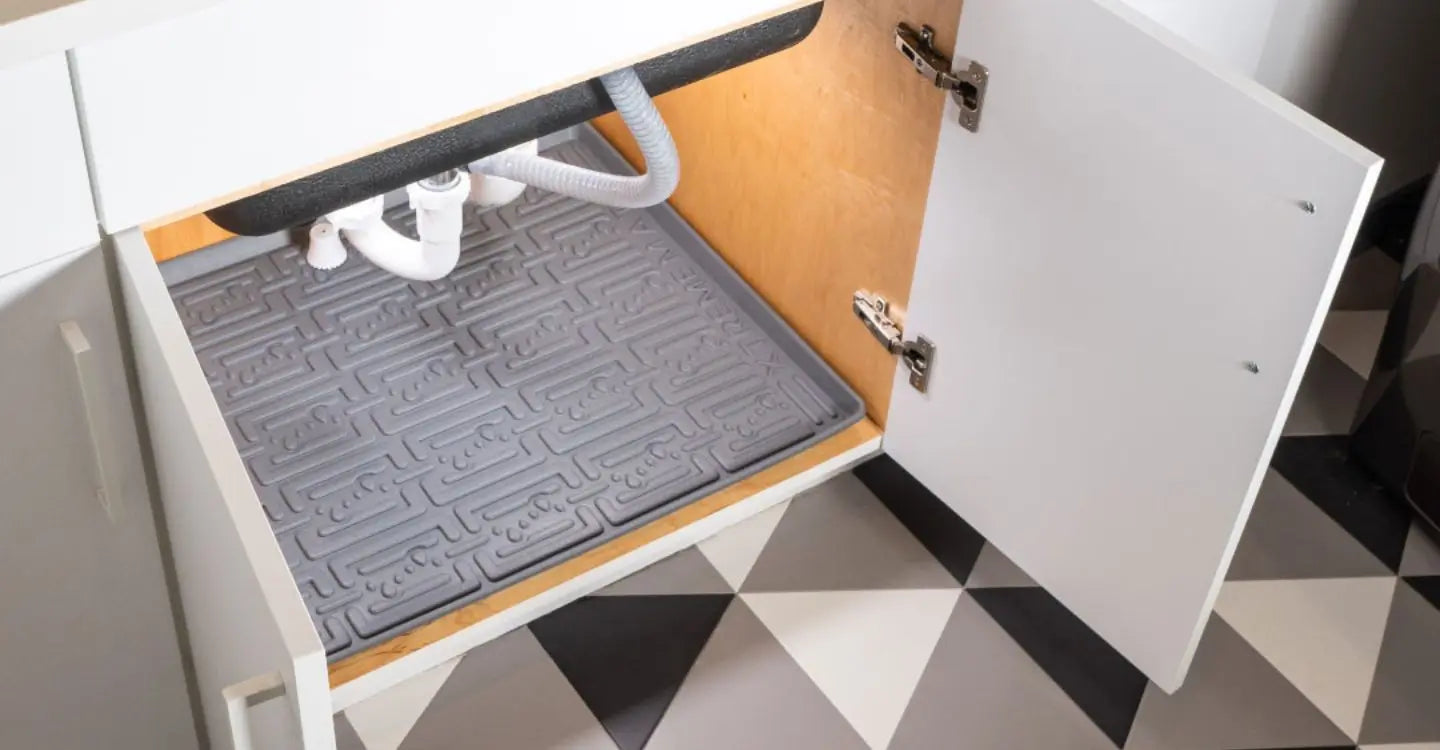
Installing under-sink mats is an effective way to protect your cabinets and floors from water damage commonly caused by leaks or spills. However, if you have visible plumbing and other such pipes under your sink, in the cabinet below, installing the mats can be a bit more challenging. Xtreme Mats understands the struggle homeowners can have with this, but with the right tools and a little know-how, it's a relatively simple process. Installing your under-sink mat can be completed in just a few steps!
In this how-to guide, we'll walk you through the process of how to best cut and shape your kitchen sink mat so it protects your home properly. Follow our instructions and check out this handy how-to video as well!
Step 1: Gathering Measurements for Custom Floor Mats
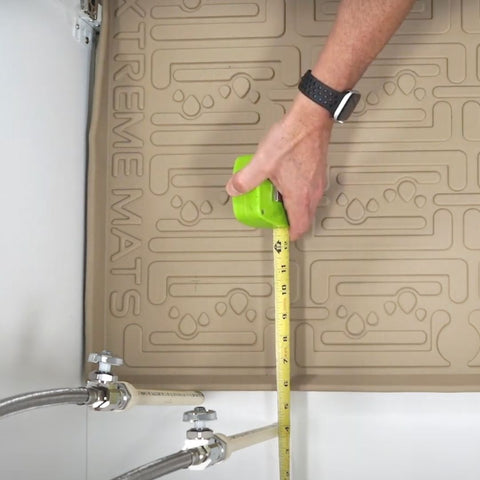
Before you make any sort of changes to your kitchen sink mats from Xtreme Mats, you need to know how large of a size you need to cover the entire bottom of the cabinet. The first step to finding out how big your under-sink mat needs to be is to measure the inside of the under-sink cabinet from the right side to the center of your plumbing pipe.
After that, follow suit by measuring the inside of the cabinet from the left side to the center of your pipe, and then measuring the inside front edge of the trim to the center of the pipe. Record all these measurements for the next step.

Step 2: Mark Your Sink Mat
Before we begin the next step, it’s important to understand that the right side of your under-sink mat will have the name “Xtreme Mats” brand name written along it. Make sure your mat is facing the correct direction before you move further.
Starting from the top outside edge of the kitchen sink mat, measure from the right-hand side and make a visible mark — with a pen or permanent marker — marking where the center of the pipe will need to fit. During this step, use the first previously-recorded measurement from Step 1.
After doing so, measure from the left-hand side and make a similar mark for the center of the pipe. If the first and second marks on the under-sink mat do not match, that is okay. For the third mark, it should be between the first and second lines, which will now act as the “center point” for the kitchen sink mat.
For this next step, measure from the front of the under-sink mat and mark again where the center of the pipe will be. It’s important to make sure the front edge of the mat is bent up at a 90-degree angle.

Step 3: Make Cuts on the Under-Sink Mat
At this point, you can go ahead and make a cross before drilling a hole where the center of the pipe will be using the marks you’ve made throughout Step 2. Make sure the hole is large enough for the pipe plus an additional 1/8 of an inch. Once the hole for the pipe is complete, use a razor or scissors to cut a strength line from the center of the hole to the back of the under-sink mat.

Step 4: Install the Kitchen Sink Mat & Enjoy
By now, your Xtreme Mats kitchen sink mat should be custom-cut to fit around the center pipe in the cabinet under the faucet. Our staff also recommends sealing the pipe around where it meets the under-sink mat as an extra precaution against flooding and other water damage.
Follow Our Xtreme Mats Video How-To Guide
For more detailed instructions on how to create your custom floor mats from Xtreme Mats, follow these in-depth video instructions. Contact our team if you have any other questions and browse all our other kitchen sink mats if you need more!
Share:
Popular Golf Cart Brands That We Work With
How Golf Cart Floor Mats Can Help With Weather Protection